How to use the ITEMs VENDOR
For Version 1.7
The Items Vendor is a light-weight vending system that uses a single script. It is meant specifically for No-Copy, i.e. Transferable Items like breedables however copyable items can be used as well. If you experience any issues in setting up your vendor please do not hesitate to contact Summer Haas for support.
General usage:
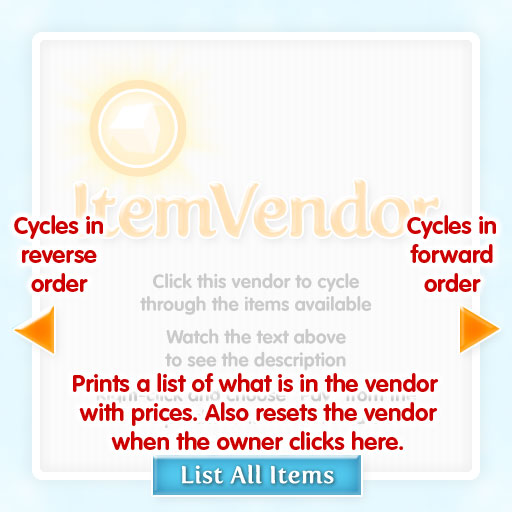
The interface to the vendor features Back & Forward buttons and a List All Items button. This button will also reset the item count and prices when the vendor owner clicks on it.
Vendor setup:
The first process in setting up your vendor is to name your items. If you are using this for breedable pet items or something with a non-descript name that cannot be changed, you can still define what they are by using the Special Item description field in the _config notecard.
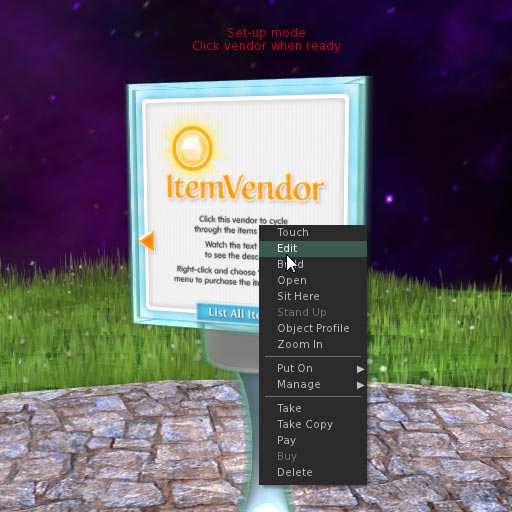
Right-click the vendor and choose "Edit". This will bring up the viewers Build toolbox.
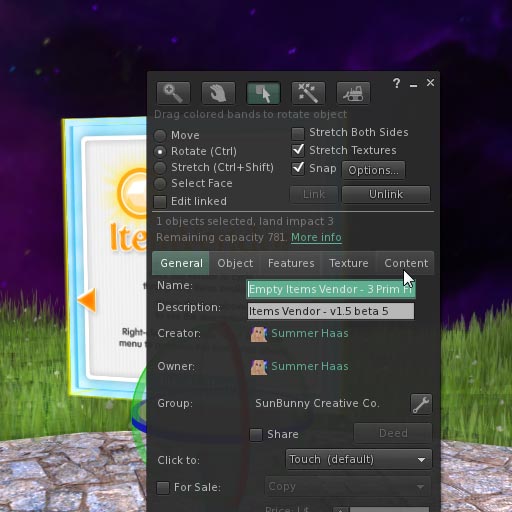
Click the Content button/tab.
Next you will need to add the items you wish to sell and configure the notecard for price and textures. This can be done in any order.
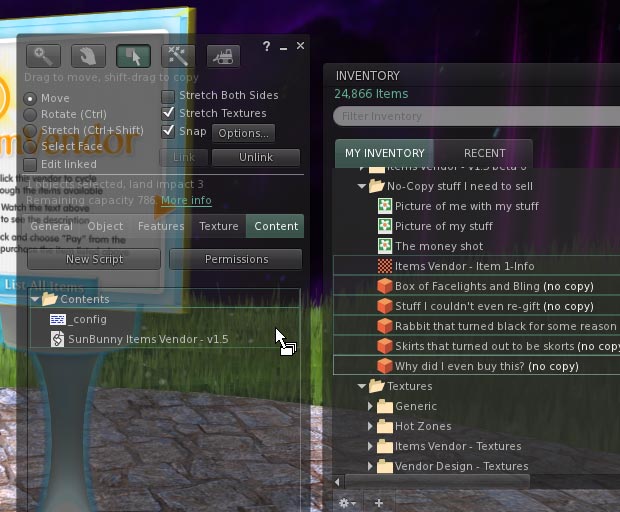
Drag your items from your inventory to the contents of the vendor. This is best done one at a time especially if you are in a laggy sim. If you want to use your own texture or one that came with the vendor, make sure to place that inside as well.
Notecard setup:
Next you will need to set up the _config notecard for the Base Item Price and enter the texture you plan to use. Using various prices and textures are discussed in detail in the Notecard _config guide under Special Items.
Open the _config notecard.
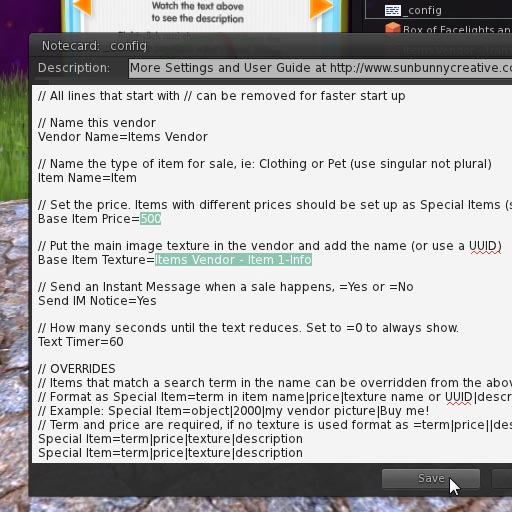
Everything can be left alone except the Base Item Price= line. Input the price you wish to use for the majority of the items. This should look like this: Base Item Price=1000. Do not add any punctuation or symbols.
Using textures:
If you want to use a different texture you will need to put the name in the notecard like this:
Base Item Texture=My Vendor Picture
Make sure the texture is created by you, or it has both Copy and Transfer permissions, then place it inside the vendor contents. There are lots of full perm textures to choose from included with the vendor. Textures are also CaSe sEnsiTivE so it's best to copy/paste the name into the notecard.
Finishing setup:
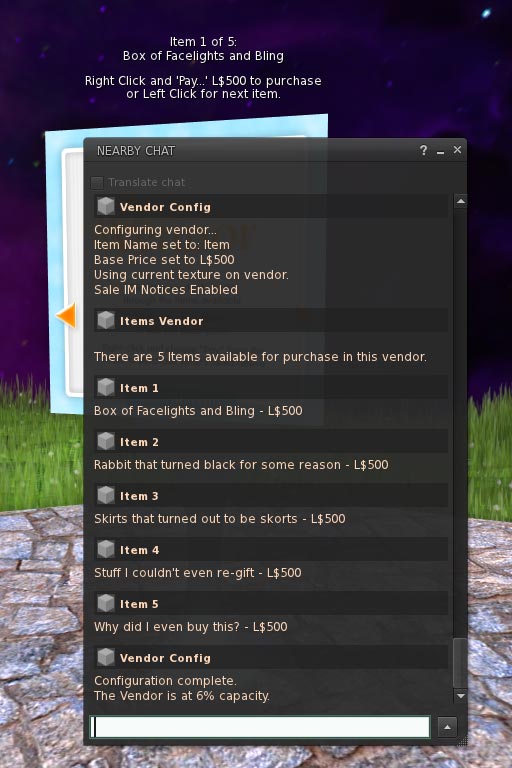
When you are done, click the vendor to start it up. It will read through the _config card and check the contents.
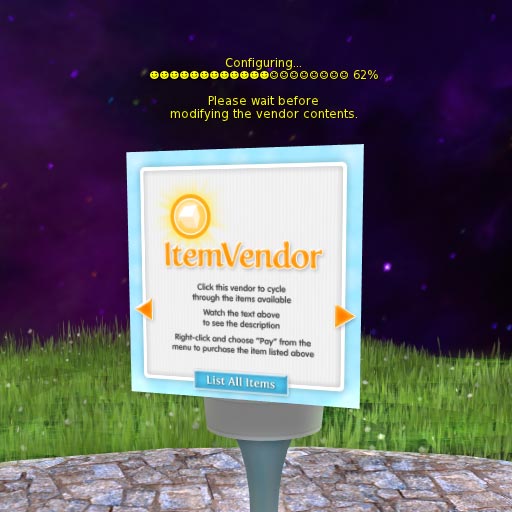
If everything was set up correctly, it will output a list of the contents and be ready for use.
Useful stuff to know
Important warnings:
- If you pick up your vendor and there are item(s) in it, the vendor will be named the last item selected. That can be really confusing. It is best to deactivate the vendor before picking it up.
- Before you put anything in the vendor, make sure your items are NOT set for sale on the item itself. Your buyers won't be aware of this and when they rez the item it will still be set for sale!
- If you remove a non-copyable item from the vendor this will not reset the inventory (SVC-304). Anytime you manually remove an item(s) from the vendor's contents you should always reset the vendor. If you do not do this, the removed item may still appear for sale until the vendor is clicked again.
- If someone buys a no-copy item and then declines it, it should go to their trash. There have been some reports of the item just vanishing. Please check the SL Jira for more info: SVC-1128, SVC-4368, VWR-24196
Deactivating the vendor & the List All Items button:
The List All Items button at the bottom of the vendor works differently if you are the owner. For regular users it will simply chat the contents and prices to them. For owners, the button will also deactive the vendor. Simply click it again to turn it back on.
To reset the vendor:
- Click the "List All Items" button towards the bottom
or
- Save new data in the _config notecard
- Re-rez the vendor
- Reset the script in the vendor
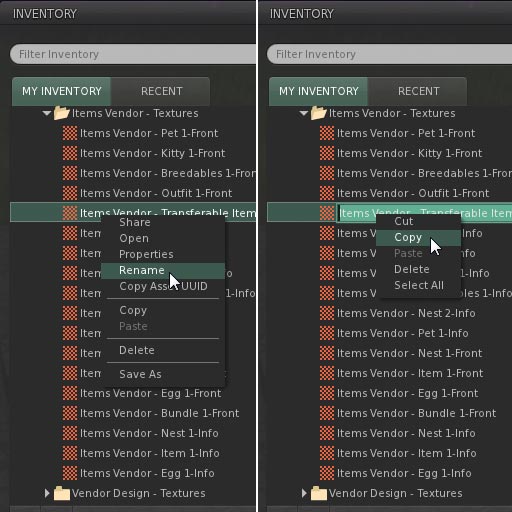
Getting texture names right:
You can be sure your texture names are accurate by using a copy/paste method. To do this, right-click the texture and choose Rename, then right-click again and choose Copy (after you copy the name just click away from the texture to avoid actually renaming it). Then paste the name right into the notecard.
For more detailed info and advanced options:
Make sure to read over the _config notecard guide.