How to use the NEST/No-COPY-Items Vendor BETA
For version 1.4.4 Beta
The first step is to name your items. If you are using this for breedable pets then make sure they can be named. If you decide not to name your items then your customer may have a difficult time determining what they are buying, however the vendor will still function.
Once you have your items named, here's how you set up a vendor:
Step 1

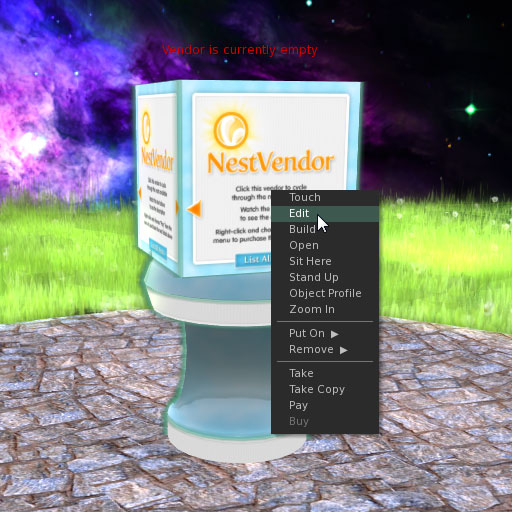
Rez the Vendor. It will ask permission to accept money from you, click "Grant". Right click the vendor and choose "Edit". This will bring up the "Build" menu. Make sure the "General" tab is chosen.
Step 2
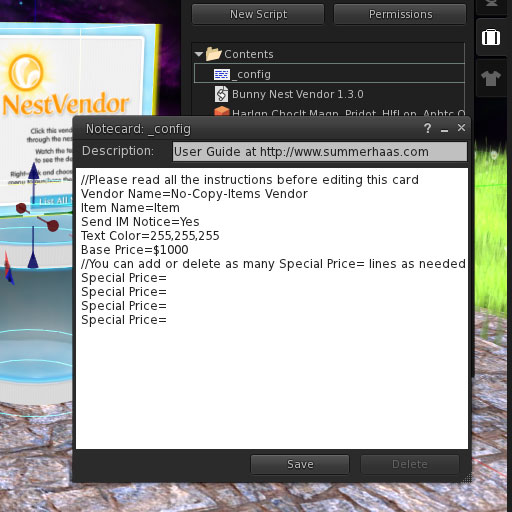
You will need to setup the "_config" notecard in the vendor specifically for pricing. Open the _config card and edit the Base Price=$1000 line to be the price you wish to use for the majority of the items in the vendor. Make sure you put in the $ sign as the script checks the number after that symbol to determine price (Base Price=1000 will not work).

Any items you wish to differ from the base price is entered into the "Special Price=" lines. They are formatted like this, "Special Price=word(s) in item name$price". For example if you put Special Price=Holland$1000 any item name containing the word holland would be priced at 1000L. Price=Silver Fox$1500 would result in all Silver Fox's priced at 1500L. Anything that does not have a special price designation is priced as the "Base Price". You can add approximately 70 Special Price entries. They are not case sensitive, meaning "Fox" and "fox" are considered the same.
In the case of duplicate Special Price settings, whichever is listed first takes priority. For instance, if you have your notecard configured like this:
Base Price=$250
Special Price=Lop$500
Special Price=Holland$1000
You might assume that all lops in the vendor will be priced at 500L and all Hollands at 1000L. Because Hollands are called Holland Lop it would actually price them at 500L as "Lop" was found first. A better way to achieve those prices would be like this:
Base Price=$250
Special Price=Lop Ear$500
Special Price=Holland Lop$1000
Step 3
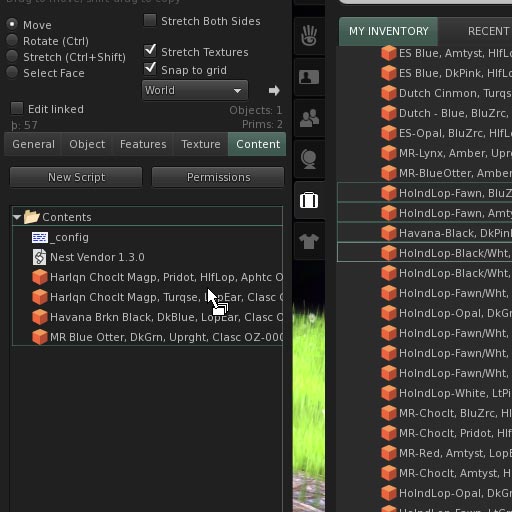
Drag your nests from your inventory to the contents of the vendor (Note: This is best done one at a time especially if you are in a laggy sim).

When you are done, always touch the "List All Items" button on the bottom of the vendor to reset it and cycle through the items to make sure you have everything in the vendor priced correctly. Also, make sure your items are not set for sale on the item itself. Your buyers will not be aware of this and they may rez the item and it will still be set for sale!
WARNING: If you remove an item from the vendor this will not reset the inventory, however adding items will (SL bug or feature? Your guess is as good as mine). Anytime you manually remove an item(s) from the vendors contents you should always reset the vendor. If you do not do this, the removed item will still appear for sale.
General Usage

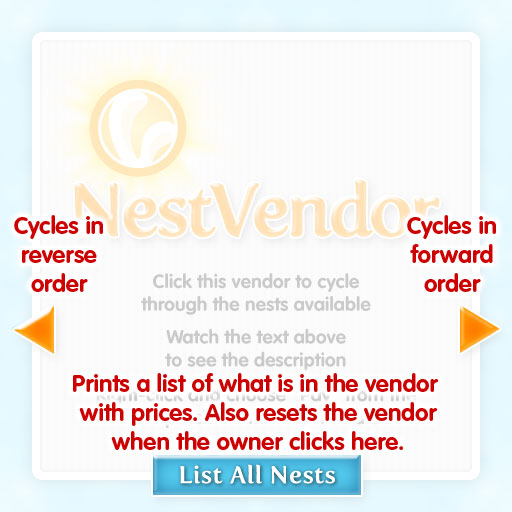
The interface to the vendor features Back & Forward buttons and a List All Items button. This button will also reset the item count and prices when the vendor owner clicks on it.
Important Notes
To reset the vendor:
- Click the "List All Items" button towards the bottom to reset the vendor count and pricing
or
- Add a item to the vendor
- Save new data in the _config notecard
- Re-rez the vendor
- Reset the script in the vendor
Granting pay rights:
This is normal of all vendors in Second Life. You must grant rights in order for it to work properly. Also, the vendor is not scripted to pay anyone or refund. It receives money only and 100% goes directly into your account.