How to use the Nest Vendor
For version 1.3
This is so easy even a cave bunny could do it!
The first step is to name your nests something other than "Ozimals Bunny: Nest". If you decide not to name your nests then your customer may have a difficult time determining what they are buying, however the vendor will still function. Included in the package is the "Nest Namer" (full version) to make that process faster.
Once you have your nests named, here's how you set up a vendor:
Step 1:
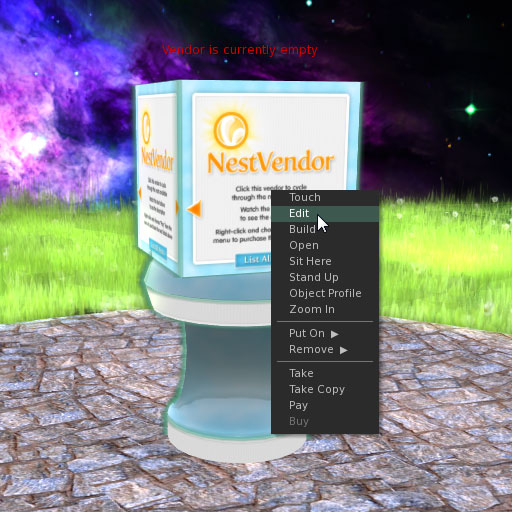
Rez the nest vendor. It will ask permission to accept money from you, click "Grant". Right click the vendor and choose "Edit". This will bring up the "Build" menu. Make sure the "General" tab is chosen.
Step 2:
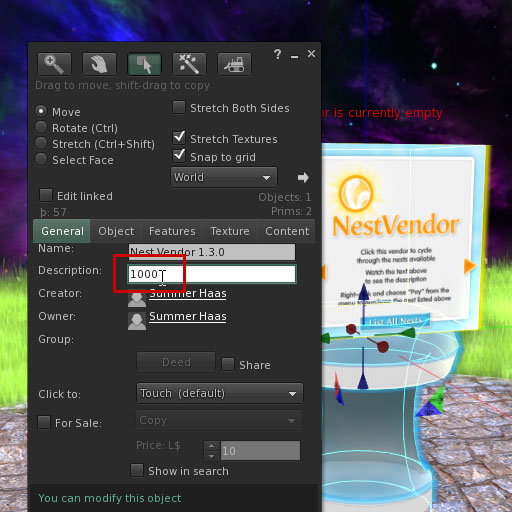
If all your nests will be priced the same amount, put the price in the "Description" line of the object:
- Right click the vendor and choose edit, pick the general tab
- You will see "Name:" and "Description:"
- Put the price number in the Description field and nothing else, no commas or periods anything!
- There is no need to name the vendor, it will name itself based on the nest chosen. This is so your transaction history shows the correct product purchased.
Advanced:
If you want to use variable pricing on nests within the same vendor
please see Advanced Features.
Step 3:
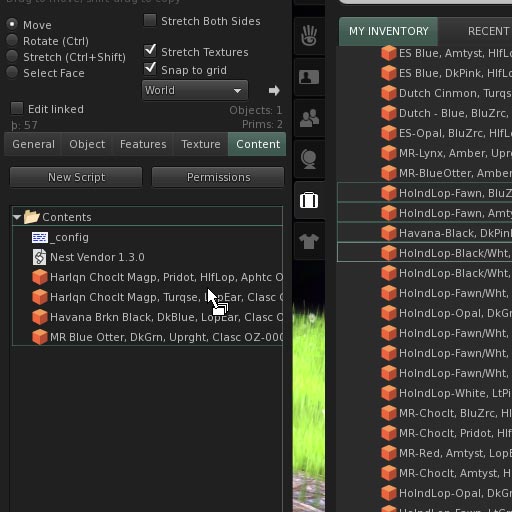
Drag your nests from your inventory to the contents of the vendor. You should cycle through the vendor to make sure the nests and prices are what you want. You can also touch the "List All Nests" button to see them listed in chat.
Note: This is best done one at a time especially if you are in a laggy sim. The vendor supports 70+ nests however more than 25 or so is not recommended. Also, make sure your nests are not set for sale on the nest itself. Your buyers will not be aware of this and they may rez the nest and it will still be set for sale.
WARNING: If you remove a nest from the vendor this will not reset the inventory, however adding nests will (SL bug or feature? Your guess is as good as mine). Anytime you manually remove a nest(s) from the vendors contents you should always reset the vendor. If you do not do this, the removed nest will still appear for sale.
General Usage
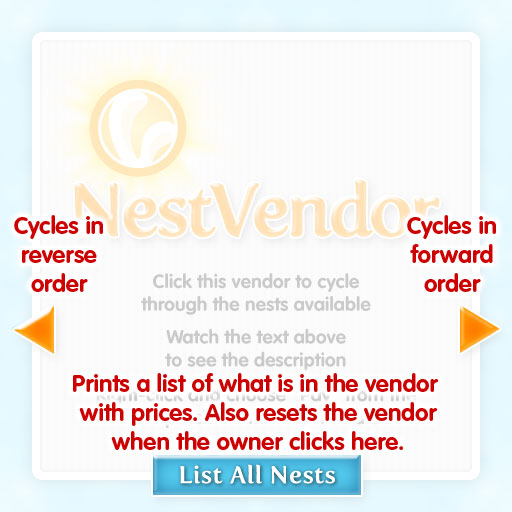
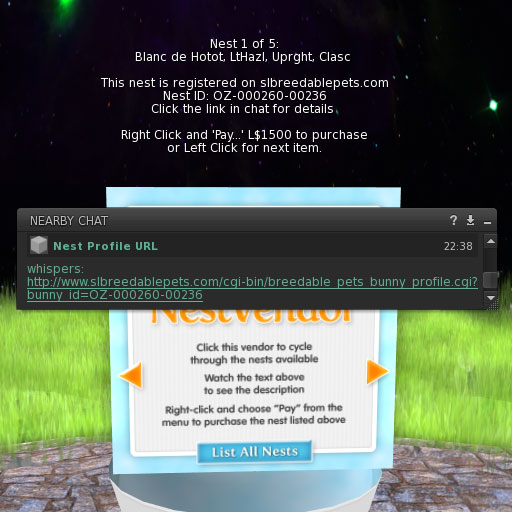
The interface to the vendor features Back & Forward buttons and a List All Nests button. This button will also reset the vendor nest count and prices when the owner clicks on it.
Automatic SL Breedable Pets mode
When you name your nests with the Nest Namer 1.3 in SLBP mode, it will tag your nests with the SL Breedable Pets ID. When one of these nests is in the vendor it will automatically detect it and list the slbreedablepets.com URL that links to your nest.
Important Notes
Pricing note:
If after you are setup you wish to change the price for the nests in the vendor by altering the description line, simply follow step 2 again. However it will not take effect until you reset the vendor.
To reset the vendor:
- Click the "List All Nests" button to reset the vendor count and pricing
or
- Add a nest to the vendor
- Save new data in the _config notecard
- Re-rez the vendor
- Reset the script in the vendor
Granting pay rights:
This is normal of all vendors in Second Life. You must grant rights in order for it to work properly. Also, the vendor is not scripted to pay anyone or refund. It receives money only and 100% goes directly into your account.